Adding custom checkboxes to JFace TreeViewer
2011/04/19
Goal:
For an RCP application which we are building at the moment we were in need of a Tree with checkboxes. It ‘s not just a question of using the JFace CheckboxTreeViewer because we wanted to control on which level in the tree the checkbox was shown. As you know, the CheckboxTreeViewer shows a checkbox on every level.
An added bonus is that now, we can change the look of the checkbox by supplying our own images.
After some investigation, I found this solution to be the easiest:
Solution:
1.
The first thing you need are two custom icons, one for a checked and one for an unchecked checkbox. I’ve used these icons for this example:
2.
Create a JFace TreeViewer with one TreeViewerColumn and three TreeItems (don’t use TreeItems with a TreeViewer in your application, use ContentProvider and LabelProvider instead). Add the unchecked icon to the TreeItems on the second level.
Example:
Composite compositeExample = new Composite(composite, SWT.NONE);
compositeExample.setLayoutData(new GridData(SWT.FILL, SWT.FILL, true, true, 1, 1));
TreeColumnLayout tcl_compositeExample = new TreeColumnLayout();
compositeExample.setLayout(tcl_compositeExample);

TreeViewer treeViewerExample = new TreeViewer(compositeExample, SWT.BORDER | SWT.FULL_SELECTION);
treeExample = treeViewerExample.getTree();
treeExample.setHeaderVisible(true);
treeExample.setLinesVisible(true);

TreeViewerColumn treeViewerColumnName = new TreeViewerColumn(treeViewerExample, SWT.NONE);
TreeColumn trclmnName = treeViewerColumnName.getColumn();
tcl_compositeExample.setColumnData(trclmnName, new ColumnWeightData(100, ColumnWeightData.MINIMUM_WIDTH, true));
trclmnName.setText("Name");

TreeItem trtmParent = new TreeItem(treeExample, SWT.NONE);
trtmParent.setImage(ResourceManager.getPluginImage("your_plugin_name", "your_image_name"));
trtmParent.setFont(FontConstants.FONT_NORMAL);
trtmParent.setText("Parent");

TreeItem trtmChild = new TreeItem(trtmParent, SWT.NONE);
trtmChild.setFont(FontConstants.FONT_NORMAL);
trtmChild.setImage(imgUnChecked);
trtmChild.setText("Child");

TreeItem trtmChild_1 = new TreeItem(trtmParent, SWT.NONE);
trtmChild_1.setFont(FontConstants.FONT_NORMAL);
trtmChild_1.setImage(imgUnChecked);
trtmChild_1.setText("Child");
trtmParent.setExpanded(true);
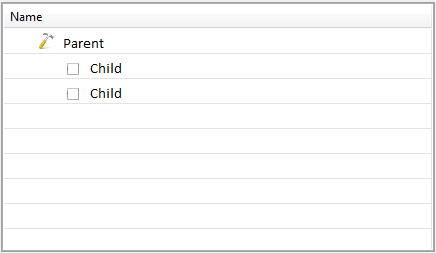
Once you have filled your tree and have a screen similar to below, you can add the real functionality.
3.
Now the icon has to change when the user clicks on it. We can achieve this by adding the following MouseListener to the tree. It will listen to clicks inside the tree and compare it with the items inside the tree. Once you know the clicked item, you can change his image.
tree_1.addMouseListener(new MouseListener(){

	@Override
	public void mouseDoubleClick(MouseEvent e) {
	}

	@Override
	public void mouseDown(MouseEvent e) {
		for(TreeItem item : tree_1.getSelection()) {
			if(item.getImage() != null) {
				if((e.x > item.getImageBounds(0).x) && (e.x < (item.getImageBounds(0).x + item.getImage().getBounds().width))) {
					if((e.y > item.getImageBounds(0).y) && (e.y < (item.getImageBounds(0).y + item.getImage().getBounds().height))) {
						setChecked(item);
					}
				}
			}
		}
	}

	@Override
	public void mouseUp(MouseEvent e) {
}});

private void setChecked(TreeItem item) {
	if(item.getImage().equals(imgUnChecked)) {
		item.setImage(imgChecked);
	}
	else {
		item.setImage(imgUnChecked);
	}
}
4.
Run you program and click on the icons, you will see that they really act like a checkbox. Now all you have to do is customize it!


